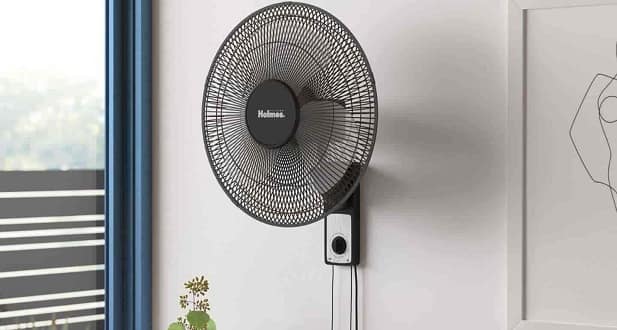
Having limited space in work areas, houses, factories, shops, apartments, warehouses thus can create suffocation if there is no alternate for cooling. In this case, only a wall-mounted fan is useful, which takes up less space as well as provides cooling and ventilation. Its rotating feature helps offer a large amount of air moving power.
There are major issues found in an industrial area such as humidity, moist air and heat which can reduce through wall fans. It is a convenient and simple process to install a wall fan. But it requires technical skills and knowledge of electrical connection. Once you read the following steps, you can assemble and install a new wall-mounted fan easily:

Step 1 – Find the right place
You have to decide that where you want to install the fan. If you are choosing a place inside an office, find the location that is on the side instead of being in the back or front of your sitting position. Anyone standing in between will be blocking the airflow, so be thoughtful about it.
- Also Read: Wall Mount Vs. Ceiling Fans – Which is Best?
Step 2 – Start by installing the mounting plates
If you don’t have an electric drill, you can rent it from the local hardware store and start the work. Using a stud founder can help you find the right place in the room or office. If the walls are made of concrete, then you should use a specific type of drill bit to make fine holes. Start by marking and installing the mounting plates.
Step 3 – Checking the mounts
Mounts are going to lift the weight of an entire fan so you should double-check that they are not lost or have any wiggle. To test, you can try to apply a little pressure and finding whether they move or not. If they don’t move, you are good to go.
Step 4 – Install the rear and front fan Grills
Get the fan out of the box and remove any plastic wrappers. Install the rear fan grill and hold it in place with the included screws. Make sure you fasten the bolt to an adequate level. Trying to fasten too tight can damage the screws. Once the screws are in place, you can look forward to installing the fan blade and fasten it. Then, the rest of the work is about installing the front fan grill.
Step 5 – Mount the fan
Before mounting the fan, it is suggested to test the fan at the nearest power outlet and check if it works perfectly or not. When everything is done, you can install the mount the fan on the wall and look forward to using it at low speed. It is time to test if the fan is not shaking too much when the rotation is off.
Step 6 – Connecting Wires
The wires of the wall mount fan can be directly plugged into the nearest power outlet, or you can connect them up in the wall, so no wires are visible at all.
Check Demo
Conclusion
Take notes about connecting the wire to the main power outlet. If you are dealing with naked wires, you should wear all the protective gear to prevent yourself from any issues related to getting shocked. If you are new to working with electrical wires, we won’t suggest you do that work. Instead, you can complete the mounting work and call an expert for connections only. By this method, you will be paying a negligible amount for the installation job. Meanwhile, considering the right place is way more crucial than it seems like, so you should be careful with mounting position.

Santosh Kumar is an editor at unfoldstuffs.com and a professional content writer. With years of experience he is passionate for creating engaging, informative and impactful topics.


