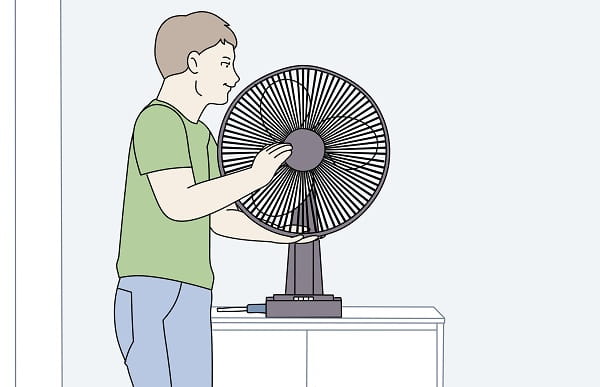
You bought a new pedestal fan and now you are stuck with its assembly? Well, it happens to many while buying pedestal fans online, because not all the brands are offering free assembly options. The common option in this situation is to do the job yourself or find an expert.
However, it is one of the simple jobs and it doesn’t require any technical especially, because all the parts are easy to connect. The perfect alternative in those situations will be to assemble the fan on your own. You can find the assemble guide included with the latest pedestal fan, or you can go with our mini, but easy to follow guide for a quick start.
Let’s get started –

Step 1 – Start From The Base
First of all, get the base out of the box and remove all the wrappers. Once the base is nice and clean, it is ready to have the pedestal fixed inside. Get the pedestal and insert it into the base plate, which is heavier and is going to support the fan. Make sure that you check all the screws and fasten them adequately.
Step 2 – Work On Motor Head
The motor is the next and most important part of a pedestal fan. You have to connect the motor with the motorhead so that you have all the basic work completed. The screw knob is the crucial part here, and you can set it to the lowest height setting for now.
Step 3 – Switch Setting
You can slide the switch in place, and all the basic parts of the pedestal fans are connected now. Even, at this moment, you can turn it on and check whether everything is going great or not.
Step 4 – Install Guards
The protective grill or front/rear guards are important. Start by installing the rear guard and fixing it into place by fastening the screws. Now, install the fan blade and make sure that you do not apply pressure on the blades. Once it is installed, rotate it to ensure that it has an equal distance from the rear guard. And you can finish the job by installing the front guard.
Step 5 – Check every screw
Once the blade is installed and you have fastened every screw, there is still the need of checking up on everything. You can start from the base and then check the motor and switches. If everything seems fine, you can adjust the height as per your need and turn on the fan. Make sure that you keep it at a low-speed setting to ensure whether it shakes or not. If everything goes fine, you can remove all the other wrappers, and you are good to go with this mini project.
Conclusion
Make sure that you refer to the assembling guide to ensure that you are not doing anything wrong. With the increasing variety in the pedestal fan market, there might be some new designs that might not work with our assemble guidepost. We hope you have a great time assembling a pedestal fan this weekend.

Santosh Kumar is an editor at unfoldstuffs.com and a professional content writer. With years of experience he is passionate for creating engaging, informative and impactful topics.


